Every year, Winter gives way to the blossoming of Spring. It’s a beautiful transition, with the blooming of colorful flowers, the birth of adorable baby animals, the beginning of wedding season, the advent of unnaturally colored marshmallow chicks and bunnies, and of course--the migration of bikini-clad college students to bodies of water near and afar. Spring is a season so refreshing and pure, its arrival makes one want to frolic in a grassy field of wildflowers, right?
Hold it, Tiny Tim. Before you tiptoe through those tulips, don’t forget to take care of your stylish stilettos! I’ve put together a short Bill of Rights for Spring Stilettos.
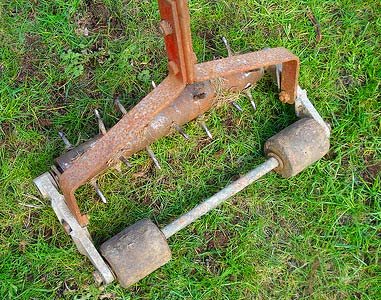
Stiletto Right#1 – Stilettos shall not be sown into the ground, like seeds
Avoid muddy, scuffed-Up heels! Traditionally, grass and high heels have combined with disastrous results—you end up providing un-solicited lawn aerating services with your mucked-up heels—and to make things worse, you appear three inches shorter while doing so.
Stiletto Right#2 – Stilettos shall never be replaced by casual cork wedges, (particularly when paired with a satin, beaded, taffeta, or velvet bridesmaid dress.)
We here at NewHeelTips.com have brought you a fantastic solu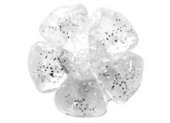 tion that allows you to walk on grass while wearing high heels. No, the solution is not a pair of cork wedges (thank goodness,) but adorable, star-shaped heel protectors!
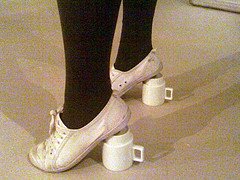
Stiletto Right #3 – Stilettos shall always be protected from grass, grime and gunk!
Our flexible, grippy heel protectors easily pop onto the bottom of your stiletto heels when you’re about to walk onto grass. When you’re back on a firm floor, you can either rinse them off and tuck them away into their included satin drawstring baggie, or simply leave them on. Indoors, these heel protectors also provide additional non-slip traction, and even soften the click-clack sound of your heels on floating laminate and engineered-wood flooring.
We know you love your stilettos and how fabulous you look while wearing them! So do yourself a favor, and grab a pair of heel protectors to keep them looking their best during all of your favorite outdoor high-fashion events this Spring!
Posted:
3/1/2011 5:45:30 PM by
Christina Melocik | with
0 comments
.jpg.aspx)
[PHOTO Jennifer Juniper J’anet]
It's a brand new year, which means by now we all should have set our New Year's resolutions! Last year, my husband's resolution was "Use what you've got." What I like about that resolution was that it wasn’t just about abstaining from spending any money at all--that’s like the financial equivalent of trying to lose weight by skipping meals. Eventually, you’ll either feel miserable from depriving yourself all the time, or you might even simply abandon the resolution entirely! Recently, I did some research on how to set goals and stick to them, and the most important advice I’ve found, is that your goals need to be realistic.
Be practical and creative.
Resolving to not spend money isn’t terribly realistic or even practical, since there are some things that actually save you more money by paying for their maintenance—like fixing a leaky faucet. “Use what you’ve got” makes more sense, as it doesn’t force you to do without day-to-day necessities, but simply requires that you get creative with the resources that you already have!
[Photo by Arne Hendriks]
Here are some examples of how he applied his resolution throughout the entire year:
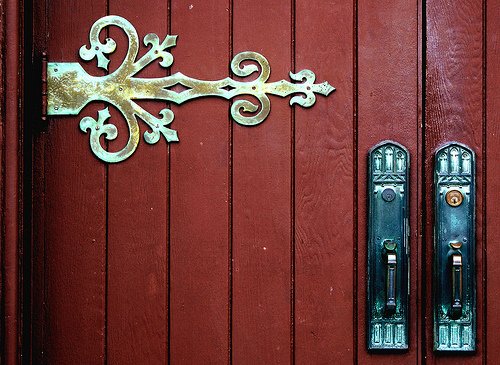
- When we moved into a new house, he kept the existing door locks, and instead bought a re-keying kit.
- He watched videos online to learn how he could unclog a sink instead of hiring a plumber.
- When the screen died on one of our laptops, instead of tossing it out and buying a new one, he connected it to an older monitor that his dad no longer needed. We now use the laptop like a desktop computer, and in fact, even use it to write this blog!
 [Photo by Avia Venefica]
You can do it, too!
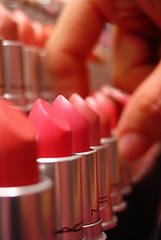
I’m happy to say that I’ve taken on his resolution this year, and so far it hasn’t been nearly as painful as the year I resolved to eat less junk food and sweets (Rice Krispy treats are my weakness!) Just last week, I threw away all of my old and unflattering shades of makeup from my cosmetic bags. I had a bad habit of buying new lipstick whenever I couldn’t locate a specific lipstick amidst my piles of unusable cosmetics. When I was done reorganizing my makeup kit, I was thrilled that everything was easier and faster to find, and that I was actually going to be getting more use out of the stuff that I really liked.
[Photo by Riley]
So tempting!!!
Save money while looking fabulous?!
I’m also happy to point out that there’s something that I’ve actually already been doing all along, that follows my new resolution: I take great care of my shoes! Regularly replacing my heel tips saves us money, just like when my husband unclogs the sink—it’s cheaper than hiring a pro, and is really not that hard to do! The reality is that just a few years ago, I rarely remembered to take my heels to the cobbler in the first place. My heels would get ruined and I’d have to buy a new pair. I was going through so many pairs of shoes this way, I ended up having to buy lower quality shoes that were not only uncomfortable, but wore out faster.
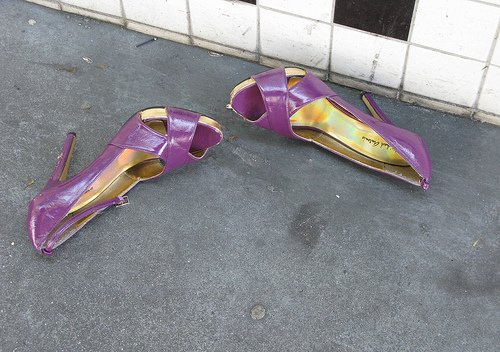
Photo by Jon Jordan
I'm pretty sure these poorly maintained shoes once belonged to Barbie.
Now, I simply have a monthly reminder in my calendar to look through my shoe collection for repairs and cleanings. It’s so easy, and I can now invest in gorgeous, well-made shoes because I know that I can take care of them without spending a ton of money!
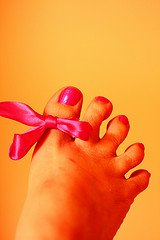
Photo by D Sharon Pruitt
Take care of yourself by taking care of your things!
So that’s the beauty of this resolution--there’s no need to deny yourself of the things you need, but just try and be open to the idea that with a little bit of elbow grease, you might already have what you’re looking for!
Posted:
1/27/2011 12:10:12 PM by
Christina Melocik | with
0 comments
Halloween is hiding just around the corner! Have you conjured up a costume, yet?
It’s obvious to anyone who's fallen under the spell of a fantastic pair of shoes, that the right pair can easily make an outfit pop (and in this case, also help you win first prize at the office costume contest!) But beware--the wrong pair of shoes may not only detract from your ensemble, but might also leave you limping and groaning over your poor, tortured tootsies!
Here are some tips for keeping your Halloween hooves happy!
1. Use shoes you already own
Halloween is not quite the ideal night to break in a new pair of shoes! If you’re planning on dancing the night away, walking door-to-door with the kiddies, or even marching in a costume parade, you’ll probably feel most confident and comfortable wearing shoes that have already conformed to your foot a bit. True—these everyday shoes may not look like they belong with your freaky Halloween costume, but the next two tips are frighteningly easy ways to dress your shoes for a costume that totally kills!
2. Buy or make shoe clips
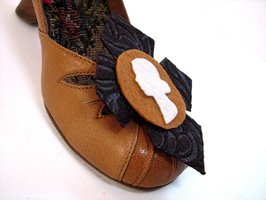
Whether you’re a witch, a fairy, or your favorite reality TV star, you can magically (and temporarily) add character to your costume by simply clipping on a bit of decoration. For a witch costume, you can clip on a buckle. For a fairy, you might snap on some silk flowers. All you’ll need is a pair of shoe clip findings (search craft stores, Etsy.com or ebay.com, or if you can’t find any, you can try using
paper clips) a hot glue gun, glue sticks, and your imagination!
Photo by Kourtney Moon
Here’s a tutorial to walk you through the shoe clip making process:
http://www.ehow.com/how_5268772_make-shoe-clips.html
 3. Buy or make boot covers!
If your costume howls for hardy boots instead of dainty slippers, then consider buying or making boot tops (also called boot covers.) They simply drape over your black or brown dress shoes to make you look like you’re wearing boots. Now, your shoes can shape shift, just like Jacob Black, Sam Merlotte, The Incredible Hulk and Teen Wolf!
If you’re good with a sewing machine, check out some of these instructions for making your own boot tops:
/Trick-or-Treat!--5-Halloween-Shoe-Tips!/TineyHo.jpg.aspx)
4. Prepare your shoes
Whether you are buying a brand new pair of shoes, buying an old pair of shoes at the vintage store, or using what you’ve already got, it’s important to make sure that your shoes and feet are prepared for your wicked night of revelry!
- If the shoes are brand new, make sure to wear them a few times to break them in before your Halloween party. If your shoes chafe or pinch, you’ll either find yourself bearing the pain in misery, or switching into a pair of flats or flip flops. That might not look as good with your costume--and, even worse, could break the illusion you so carefully crafted when you first put your costume together!
- If you’re thinking about using padded or gelled insoles, test them out beforehand, as some people feel they can be a trick or a treat--sometimes surprisingly making the fit of your shoe tighter and less comfortable.
- Test the bottoms of the shoes to see if they have enough traction. To avoid making embarrassing slips while wearing something that’s admittedly a little bit embarrassing already, consider adding adhesive non-slip soles to your shoes.
-
If you’re wearing older shoes check to make sure that they’re in overall good repair, and that your heel tips are in good condition. You wouldn’t want to scratch up the dance floor with a worn out heel tip! There are better (and less painfully embarrassing ways) to leave your mark on a party than scratching mysterious, arcane glyphs all over your host's hardwood floor!
5. Prepare your feet
Regardless of whether your shoes are new, or not, consider what shoes you wear the week before you plan on wearing your Halloween heels. If your Halloween shoes are higher than you typically wear any given day, you’d be best off gradually increasing your heel size in half inch increments throughout the week, and then gradually reducing your heel afterward in the same manner. This will not only keep you from losing feeling in your toes the day after, but also is good practice for proper foot health.
From all of us at NewHeelTips.com and Heeltips.com.au:
Have a Happy Halloween!
Posted:
10/14/2010 3:45:04 AM by
Christina Melocik | with
1 comments
Imelda has nothing on you.
Has it gotten to that point, yet? Do you have so many shoes, that you've run out of places to put them?
You're not alone!

Many of us have a few pairs of shoes that we keep in heavy rotation, with the rest of our collection accumulating in various nooks and crannies around the house--under the bed, in high, hard-to-reach shelves, piled in the hallway, and the most shameful location of them all--in a big cardboard box in your closet. Yes, some of these shoes need to have the buckles repaired, or the
heel tips replaced, or simply need to be polished. Or maybe they're just not as cute as you thought they were when you bought them for 50% off at that big blowout clearance sale two winters ago. Regardless of the situation, they've been banished to 'THE BOX', where they will live until your future granddaughters finally pull them out for their "retro" day school dance.
Is there anything really wrong with having a big box of shoes?
I'm afraid, dear shoe collector, it
is wrong for the following reasons:
Out of sight, out of mind
I have a pair of adorable espadrilles that I regretfully forget to wear each summer. Why don't I wear them? Because I keep them with all my other large or heavy boots and shoes, that are worn almost exclusively in the fall and winter. If I would only reorganize my shoes so that these were more visible, then I'd actually wear them once in a while! If your shoes are stuck in 'THE BOX', how likely do you think you're going to remember to wear them?
Ahoy mate-y!
Okay, maybe you have a special outfit that you always wear with one pair of shoes. And maybe you don't wear these shoes with any other outfits (which is why they probably ended up in the box in the first place!) When you finally find an excuse to wear these "sole mates" (get it?) then the hunt begins. Maybe it's just me, but I think I'm cursed, somehow, because I can only ever find my left shoe when I'm in a hurry. The mate just somehow manages to evade my grasp unless I make a giant mess--dumping out that entire box of shoes, just so I can find the uncooperative rogue mate to my special, oh-so-adorable left shoe. A lot of stress could easily be avoided, if only I didn't have to organize a search party each time I wanted to wear a pair of shoes from 'THE BOX'.
And the single, most important reason why you shouldn't keep your shoes piled in 'THE BOX':
It's destructive behavior
Shoes can sometimes take a bit of a beating (we DO walk on them, after all!) However, you can't expect your shoes to be squashed together into 'THE BOX' (with stiletto's, Velcro, and dirty or possibly oily shoe soles,) and expect your pointy toes to stay pointy, your satin & silk slippers to remain clean, your leather to appear uncreased and un-scuffed, and your ruffles to lay un-bent. If you keep your shoes in this undignified manner, you're not only allowing them to take on a sloppy & unattractive appearance, but you're also shortening their lifespans! Now, that's just cruel.
It's a tough job, but somebody's got to do it!
Here are five tips for dealing with your shoe refugees:
1. Family therapy!
Find all the shoes from 'THE BOX' that need repair, and separate which shoes are worth repairing, and which might need to have their last dance in the dumpster. For the remaining shoes, categorize them into groups based on the type of repair they need, and schedule a separate day for each type of repair. One weekend can be devoted to replacing insoles. Another weekend, you can scrounge up a pair of pliers and a hammer to
replace heel tips en masse (
ordering replacement heel tips all at once also saves on shipping costs!) Perhaps a warm and sunny afternoon, you can find an outdoor spot or well-ventilated area in your home to break out the shoe polish and work out those scuffs. You can even keep a separate group for serious shoe repairs that require you to make a special trip to a cobbler. If you categorize the types of repairs, you won't get as overwhelmed, you'll save time and money, and you'll find 'THE BOX' broken down and recycled in no time!
2. Give them up for adoption!
It may cause you pain now, but believe me when I tell you that you will not miss shoes that you never wear. Find the shoes that get the least amount of wear, and simply get rid of them. Give them to a friend, sell them to a clothing consignment store, or donate them! There are even programs that will take sports shoes and recycle them for other uses!
Here is a list of some organizations who take shoe donations for re-use or recycling:
3. Give them a place to call home
For the shoes that you end up keeping, consider creating an organization system that gives each pair of shoes their own space. Though it can cost a decent amount of money and space to do so, you can consider this part of the cost of maintaining your shoes. Shoe racks come in several designs--some are freestanding on the floor, some hang from inside your closet or closet door. Some people devote entire shelved closets to shoes, while others (myself, included) have special pieces of furniture to store theirs (I use a wardrobe fitted with many shelves.) One of my favorite shoe organization solutions is to buy clear boxes for each pair, and to label each box with a photo of the shoes. Either way you store them, remember that clear and easy visual access, as well as a location with close proximity to where you dress yourself, are both important factors to a successful storage design.
4. Give support
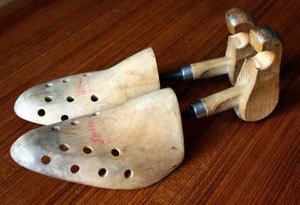
Photo by Lokarta
Shoes get stretched by your feet and your perspiration while you wear them, particularly if they're made of natural materials. Some even say that your shoes shrink when you don't wear them regularly. You can help maintain the shape and texture of your shoes by purchasing and using shoe trees. In addition to warding off creases, they also can help protect the toe box of your shoes from getting crushed if they are kept on an open shoe rack. Wooden shoe trees (particularly cedar) can also absorb odor and moisture, which in turn, increases the lifespan of your beloved shoes. As a temporary and partial solution, you can also stuff your shoes (those ones still languishing in 'THE BOX') with crumpled newspaper until you have time to deal with them appropriately. Again, this isn't a long-term solution, but it may help avoid further creasing and crushing.
Lastly, my favorite tip...
5. Mix it up
If they're in good repair, find an excuse to actually wear your shoes. Not only does this give your 'work horse' shoes a breather (allowing wear and tear to be distributed across a larger number of shoes,) but it allows you to get your money's-worth out of your entire collection. Why buy a pair of shoes if you aren't going to enjoy them? Plus, it's fun! I typically choose my outfit based on which top or dress I want to wear--pants/skirts are secondary, while shoes and accessories are the last items chosen. I've found it's actually kind of fun to break my routine, by choosing an outfit that revolves around a pair of shoes that I haven't worn often enough. If you do this, be prepared for all the compliments you'll receive, such as,
"Cute shoes--are they new?"
or
"You look different today--I'm not sure why, but I like it!"
A more organized future awaits you!
Acceptance of your shoe hoarding tendency is the first and hardest step to overcome; the rest takes time, patience, and maybe even a bit of elbow grease. But after whittling down 'THE BOX', you'll find that getting dressed is easier and more fun with everything in it's proper place and in it's best condition!
Posted:
9/30/2010 7:55:49 AM by
Christina Melocik | with
0 comments
 Photo by Janeway216
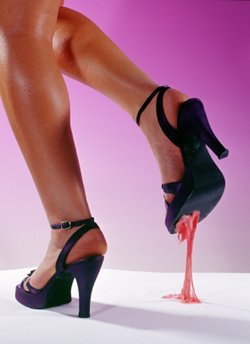
School's back in session! While some of us are furiously coordinating that perfect first-day-of-school ensemble, let us not forget that school can be a dangerous place for our fabulous first-day-of-school shoes! Those of us in particular who attend schools in sunny climates or large school campuses, may find ourselves walking through vast lengths of concrete that will quickly wear down our soles and heel tips. However, loyal customers of
NewHeelTips.com are already at the head of the class when it comes to replacing our heeltips before our shoes are ruined. But what do we do when we accidentally take a step in our classmates' sticky gum?
If we're wearing casual shoes that are hardy and unlikely to show damage, there are several gum removal options available: We can rub the gum in sand or rough concrete, or even spray the gum with an oily substance like WD-40, peanut butter, baby oil, or Goo Gone before rubbing it off with paper towels. However, for those of us who wear shoes that require more delicate handling, or who would just prefer a more cautious method, it's time to start taking notes on the following gum-removal project:
Before we begin, we'll need to have an air-tight food storage bag (large enough to easily fit your shoe) a putty knife, a timer, and enough space in your freezer to place the shoe.
1. If at first you don't succeed, dry, dry again
Allow the insides and outsides of the shoe to dry completely before we begin. If it's damp from sweat, or has rain or snow on it, let it sit somewhere dry overnight before beginning this project.
2. This plastic bag isn't for your sandwich...
Place the gummed-up shoe in the food storage bag and if the gum is still sticky, press it into the plastic. Never allow the shoe to buckle or fold in the plastic bag, as this may create permanent wrinkles in the shoe, and may even weaken the integrity of the shoe's structure. Find a larger bag if it doesn't fit easily into the bag at hand. Also make sure the bag is air-tight and sealed to prevent moisture from further damaging the shoe.
3. Watch the clock
Place the bagged shoe in the freezer and set the timer for one hour. Don't squeeze or force the shoe into the freezer for the same reasons as described in step 2.
4. Class is dismissed.
Remove the bagged shoe from the freezer after one hour, and while being careful to not warm the gum with body heat from your hands, carefully remove the shoe from the plastic bag. The gum may, or may not transfer off of the shoe and onto the plastic. If it remains on the shoe, proceed to step 5 while the gum is still frozen.
5. Apply yourself!
Using the putty knife, carefully chip off the gum, angling the putty knife underneath the edge of the gum. Make sure to not strain the shoe's sole by flexing the shoe too much, and also be careful to avoid scratching other areas of the shoe.
Congratulations! We've mastered the art of gum removal! A+!
Posted:
8/20/2010 3:47:44 PM by
Christina Melocik | with
0 comments