 Photo by Janeway216
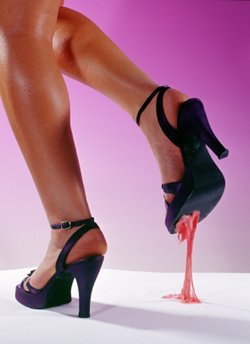
School's back in session! While some of us are furiously coordinating that perfect first-day-of-school ensemble, let us not forget that school can be a dangerous place for our fabulous first-day-of-school shoes! Those of us in particular who attend schools in sunny climates or large school campuses, may find ourselves walking through vast lengths of concrete that will quickly wear down our soles and heel tips. However, loyal customers of
NewHeelTips.com are already at the head of the class when it comes to replacing our heeltips before our shoes are ruined. But what do we do when we accidentally take a step in our classmates' sticky gum?
If we're wearing casual shoes that are hardy and unlikely to show damage, there are several gum removal options available: We can rub the gum in sand or rough concrete, or even spray the gum with an oily substance like WD-40, peanut butter, baby oil, or Goo Gone before rubbing it off with paper towels. However, for those of us who wear shoes that require more delicate handling, or who would just prefer a more cautious method, it's time to start taking notes on the following gum-removal project:
Before we begin, we'll need to have an air-tight food storage bag (large enough to easily fit your shoe) a putty knife, a timer, and enough space in your freezer to place the shoe.
1. If at first you don't succeed, dry, dry again
Allow the insides and outsides of the shoe to dry completely before we begin. If it's damp from sweat, or has rain or snow on it, let it sit somewhere dry overnight before beginning this project.
2. This plastic bag isn't for your sandwich...
Place the gummed-up shoe in the food storage bag and if the gum is still sticky, press it into the plastic. Never allow the shoe to buckle or fold in the plastic bag, as this may create permanent wrinkles in the shoe, and may even weaken the integrity of the shoe's structure. Find a larger bag if it doesn't fit easily into the bag at hand. Also make sure the bag is air-tight and sealed to prevent moisture from further damaging the shoe.
3. Watch the clock
Place the bagged shoe in the freezer and set the timer for one hour. Don't squeeze or force the shoe into the freezer for the same reasons as described in step 2.
4. Class is dismissed.
Remove the bagged shoe from the freezer after one hour, and while being careful to not warm the gum with body heat from your hands, carefully remove the shoe from the plastic bag. The gum may, or may not transfer off of the shoe and onto the plastic. If it remains on the shoe, proceed to step 5 while the gum is still frozen.
5. Apply yourself!
Using the putty knife, carefully chip off the gum, angling the putty knife underneath the edge of the gum. Make sure to not strain the shoe's sole by flexing the shoe too much, and also be careful to avoid scratching other areas of the shoe.
Congratulations! We've mastered the art of gum removal! A+!